
Spring MVC多文件上传(附带实例) 图片看不了?点击切换HTTP 返回上层
本小节继续通过 springMVCDemo11 应用案例讲解 Spring MVC 框架如何实现多文件上传,具体步骤如下:
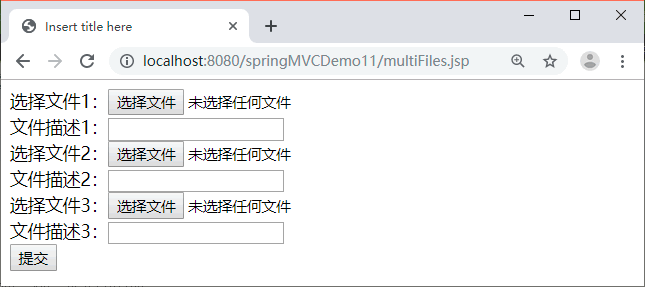
图 1 多文件选择页面
在图 1 中选择文件并输入文件描述,然后单击“提交”按钮上传多个文件,若成功则显示如图 2 所示的结果。
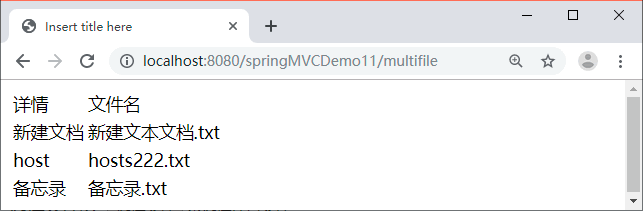
图 2 多文件成功上传结果
1)创建多文件选择页面
在 WebContent 目录下创建 JSP 页面 multiFiles.jsp,在该页面中使用表单上传多个文件,具体代码如下:1 2 3 4 5 6 7 8 9 10 11 12 13 14 15 16 17 18 19 20 21 | <%@ page language="java" contentType="text/html; charset=UTF-8" pageEncoding="UTF-8"%><!DOCTYPE html PUBLIC "-//W3C//DTD HTML 4.01 Transitional//EN" "http://www.w3.org/TR/html4/loose.dtd"><html><head><meta http-equiv="Content-Type" content="text/html; charset=UTF-8"><title>Insert title here</title></head><body> <form action="${pageContext.request.contextPath }/multifile" method="post" enctype="multipart/form-data"> 选择文件1:<input type="file" name="myfile"><br> 文件描述1:<input type="text" name="description"><br /> 选择文件2:<input type="file" name="myfile"><br> 文件描述2:<input type="text" name="description"><br /> 选择文件3:<input type="file" name="myfile"><br> 文件描述3:<input type="text" name="description"><br /> <input type="submit" value="提交"> </form></body></html> |
2)创建 POJO 类
在上传多文件时需要 POJO 类 MultiFileDomain 封装文件信息,MultiFileDomain 类的具体代码如下:1 2 3 4 5 6 7 8 | package pojo;import java.util.List;import org.springframework.web.multipart.MultipartFile;public class MultiFileDomain { private List<String> description; private List<MultipartFile> myFile; // 省略setter和getter方法} |
3)添加多文件上传处理方法
在控制器类 FileUploadController 中添加多文件上传的处理方法 multiFileUpload,具体代码如下:1 2 3 4 5 6 7 8 9 10 11 12 13 14 15 16 17 18 19 20 21 22 23 24 25 | /*** 多文件上传*/@RequestMapping("/multifile")public String multiFileUpload(@ModelAttribute MultiFileDomain multiFileDomain,HttpServletRequest request) { String realpath = request.getServletContext().getRealPath("uploadfiles"); File targetDir = new File(realpath); if (!targetDir.exists()) { targetDir.mkdirs(); } List<MultipartFile> files = multiFileDomain.getMyFile(); for (int i = 0; i < files.size(); i++) { MultipartFile file = files.get(i); String fileName = file.getOriginalFilename(); File targetFile = new File(realpath, fileName); // 上传 try { file.transferTo(targetFile); } catch (Exception e) { e.printStackTrace(); } } logger.info("成功"); return "showMulti";} |
4)创建成功显示页面
在 JSP 文件夹中创建多文件上传成功显示页面 showMulti.jsp,具体代码如下:1 2 3 4 5 6 7 8 9 10 11 12 13 14 15 16 17 18 19 20 21 22 23 24 25 26 27 | <%@ page language="java" contentType="text/html; charset=UTF-8" pageEncoding="UTF-8"%><%@taglib uri="http://java.sun.com/jsp/jstl/core" prefix="c"%><!DOCTYPE html PUBLIC "-//W3C//DTD HTML 4.01 Transitional//EN" "http://www.w3.org/TR/html4/loose.dtd"><html><head><meta http-equiv="Content-Type" content="text/html; charset=UTF-8"><title>Insert title here</title></head><body> <table> <tr> <td>详情</td> <td>文件名</td> </tr> <!-- 同时取两个数组的元素 --> <c:forEach items="${multiFileDomain.description}" var="description" varStatus="loop"> <tr> <td>${description}</td> <td>${multiFileDomain.myfile[loop.count-1].originalFilename}</td> </tr> </c:forEach> <!-- fileDomain.getMyfile().getOriginalFilename() --> </table></body></html> |
5)测试文件上传
发布 springMVCDemo11 应用到 Tomcat 服务器并启动 Tomcat 服务器,然后通过地址“http://localhost:8080/springMVCDemo11/multiFiles.jsp”运行多文件选择页面,运行结果如图 1 所示。图 1 多文件选择页面
在图 1 中选择文件并输入文件描述,然后单击“提交”按钮上传多个文件,若成功则显示如图 2 所示的结果。
图 2 多文件成功上传结果