
使用系统提供的ContentProvider 图片看不了?点击切换HTTP 返回上层
Android 系统提供了很多 ContentProvider,以便在应用程序间共享系统数据。
系统提供的 ContentProvider 都存放在 android.provider 包下,例如 android.provider.ContactsContract、android.provider.MediaStore、android.provider.CalendarContract 等。
本节以访问系统联系人列表为例,讲解如何通过系统提供的 ContentProvider 获取数据。
在 Android 2.0(API Level 5)之前,系统所提供的联系人 ContentProvider 为 android.provider.Contacts。
从 Android 2.0 开始,联系人列表相关信息被存放在 android.provider.ContactsContract 中。使用 ContactsContract 获取系统联系人列表的方法与之前有所不同,虽然形式上较以前复杂了一点,但是可以获取一个联系人的多个电话号码。
实例 ContactsCPDemo 演示了使用 ContactsContract 获取系统中所有联系人的名字和电话号码,并且显示出来的过程。为方便起见,假定每个联系人仅有一个电话号码,其运行效果如图 1 所示。
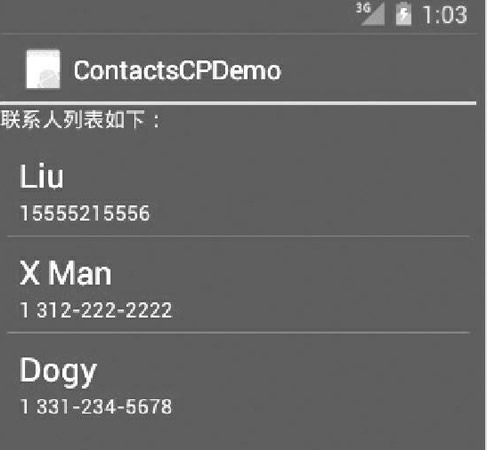
图 1 ContactsCPDemo界面
该效果由 ListView 组件实现。实例 ContactsCPDemo 中布局文件 main.xml 的代码如下:
实例 ContactsCPDemo 要访问系统联系人列表,需要拥有“android.permission.READ_CONTACTS”权限。
实例 ContactsCPDemo 中 AndroidManifest.xml 文件的代码如下:
实例 ContactsCPDemo 中 MainActivity.java 文件的代码如下:
其中:
使用了 Android 系统提供的 simple_list_item_2 布局,并将该布局应用到 main.xml 文件的 ListView 组件中。
系统提供的 ContentProvider 都存放在 android.provider 包下,例如 android.provider.ContactsContract、android.provider.MediaStore、android.provider.CalendarContract 等。
本节以访问系统联系人列表为例,讲解如何通过系统提供的 ContentProvider 获取数据。
在 Android 2.0(API Level 5)之前,系统所提供的联系人 ContentProvider 为 android.provider.Contacts。
从 Android 2.0 开始,联系人列表相关信息被存放在 android.provider.ContactsContract 中。使用 ContactsContract 获取系统联系人列表的方法与之前有所不同,虽然形式上较以前复杂了一点,但是可以获取一个联系人的多个电话号码。
实例 ContactsCPDemo 演示了使用 ContactsContract 获取系统中所有联系人的名字和电话号码,并且显示出来的过程。为方便起见,假定每个联系人仅有一个电话号码,其运行效果如图 1 所示。
图 1 ContactsCPDemo界面
该效果由 ListView 组件实现。实例 ContactsCPDemo 中布局文件 main.xml 的代码如下:
1 2 3 4 5 6 7 8 9 10 11 12 13 14 15 16 17 | <?xml version="1.0" encoding="utf-8"?><LinearLayout xmlns:android="http://schemas.android.com/apk/res/android" android:layout_width="fill_parent" android:layout_height="fill_parent" android:orientation="vertical"> <TextView android:layout_width="fill_parent" android:layout_height="wrap_content" android:text="联系人列表如下:" /> <ListView android:id="@+id/listView" android:layout_width="fill_parent" android:layout_height="wrap_content" android:padding="5dip" /></LinearLayout> |
实例 ContactsCPDemo 中 AndroidManifest.xml 文件的代码如下:
1 2 3 4 5 6 7 8 9 10 11 12 13 14 15 16 17 18 19 20 21 | <?xml version="1.0" encoding="utf-8"?><manifest xmlns:android="http://schemas.android.com/apk/res/android" package="introduction.android.contactscpdemo"> <uses-permission android:name="android.permission.READ_CONTACTS" /> <application android:allowBackup="true" android:icon="@mipmap/ic_launcher" android:label="@string/app_name" android:roundIcon="@mipmap/ic_launcher_round" android:supportsRtl="true" android:theme="@style/AppTheme"> <activity android:name=".MainActivity"> <intent-filter> <action android:name="android.intent.action.MAIN" /> <category android:name="android.intent.category.LAUNCHER" /> </intent-filter> </activity> </application></manifest> |
1 2 3 4 5 6 7 8 9 10 11 12 13 14 15 16 17 18 19 20 21 22 23 24 25 26 27 28 29 30 31 32 33 34 35 36 37 38 39 40 41 42 43 44 45 46 47 48 49 50 51 52 53 54 55 56 57 58 59 60 61 62 63 64 65 66 67 | package introduction.android.contactscpdemo;import java.util.ArrayList;import java.util.HashMap;import java.util.Map;import android.app.Activity;import android.database.Cursor;import android.os.Bundle;import android.provider.ContactsContract;import android.widget.ListView;import android.widget.SimpleAdapter;public class MainActivity extends Activity { private SimpleAdapter listAdapter; private ListView listview; private ArrayList<Map<String, String>> data; private HashMap<String, String> item; /** * Called when the activity is first created. */ @Override public void onCreate(Bundle savedInstanceState) { super.onCreate(savedInstanceState); setContentView(R.layout.activity_main); listview = (ListView) this.findViewById(R.id.listView); data = new ArrayList<Map<String, String>>(); Cursor cursor = this.getContentResolver().query(ContactsContract.Contacts.CONTENT_URI, null, null, null, null); while (cursor.moveToNext()) { int idFieldIndex = cursor.getColumnIndex(ContactsContract.Contacts._ID); int id = cursor.getInt(idFieldIndex);//根据列名取得该联系人的id int nameFieldIndex = cursor.getColumnIndex(ContactsContract.Contacts.DISPLAY_NAME); String name = cursor.getString(nameFieldIndex); //根据列名取得该联系人的name int numCountFieldIndex = cursor.getColumnIndex (ContactsContract.Contacts.HAS_PHONE_NUMBER); //获取联系人的电话号码个数 int numCount = cursor.getInt(numCountFieldIndex); String phoneNumber = ""; if (numCount > 0) { //联系人至少有一个电话号码 //在类 ContactsContract.CommonDataKinds.Phone中根据id查询相应联系人的所有电话 Cursor phonecursor = getContentResolver().query( ContactsContract.CommonDataKinds.Phone.CONTENT_URI, null, ContactsContract.CommonDataKinds.Phone.CONTACT_ID + "=?", new String[]{Integer.toString(id)}, null); if (phonecursor.moveToFirst()) { //仅读取第一个电话号码 int numFieldIndex = phonecursor.getColumnIndex(ContactsContract. CommonDataKinds.Phone.NUMBER); phoneNumber = phonecursor.getString(numFieldIndex); } } item = new HashMap<String, String>(); item.put("name", name); item.put("phoneNumber", phoneNumber); data.add(item); } listAdapter = new SimpleAdapter(this, data, android.R.layout.simple_list_item_2, new String[]{ "name", "phoneNumber" }, new int[]{android.R.id.text1, android.R.id.text2}); listview.setAdapter(listAdapter); }} |
1 2 3 4 5 6 | listAdapter = new SimpleAdapter(this, data, android.R.layout.simple_list_item_2, new String[]{ "name", "phoneNumber"}, new int[]{android.R.id.text1, android.R.id.text2});listview.setAdapter(listAdapter); |